This guide covers the use of Panopto without Canvas when accessed via TP. It applies to courses set up in advance for use without Canvas (including parts of Medicine). Students are imported from FS and given view access in Panopto. Instructors are imported from FS and TP (from activities) and given edit access in Panopto.
Recording lectures in an auditorium
Panopto replaces Forelesningsopptak-2 as the lecture recording solution. Teaching machines in auditoriums should have the Panopto client installed.
- Log in to TP
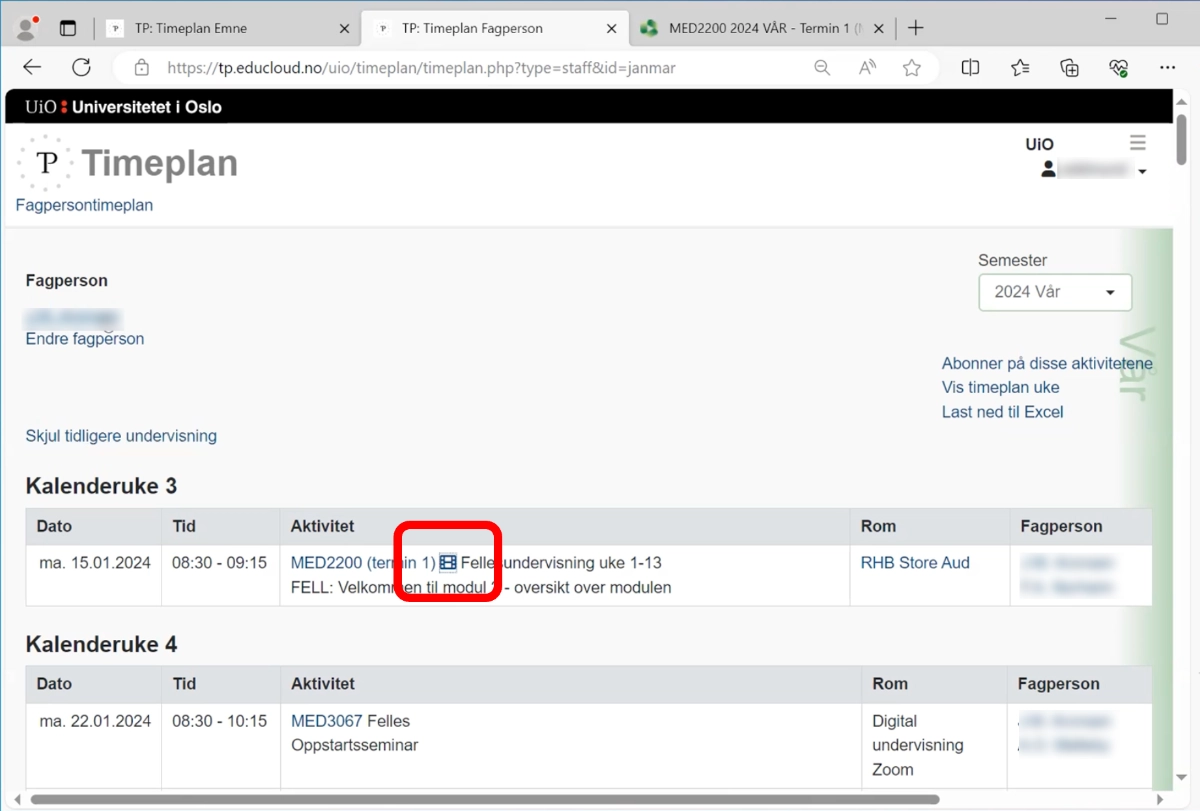
- Find the lecture (teaching activity) either in the personal teaching schedule (fagpersontimeplanen) or in the course schedule (emnetimeplanen).
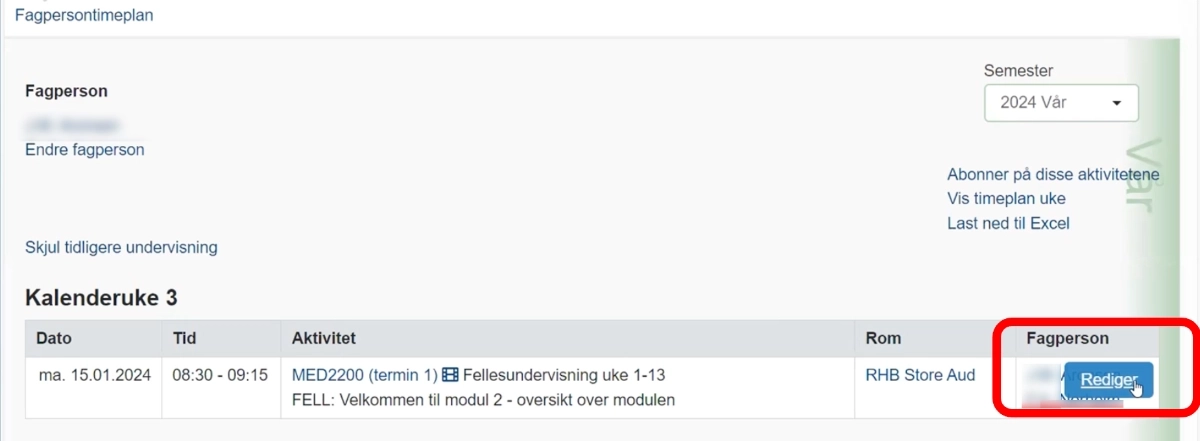
- In the personal teaching schedule, there is a small video button (film symbol) in the row for the lecture, just after the course code. This links to the Panopto folder for the course (only for courses with a Panopto folder).
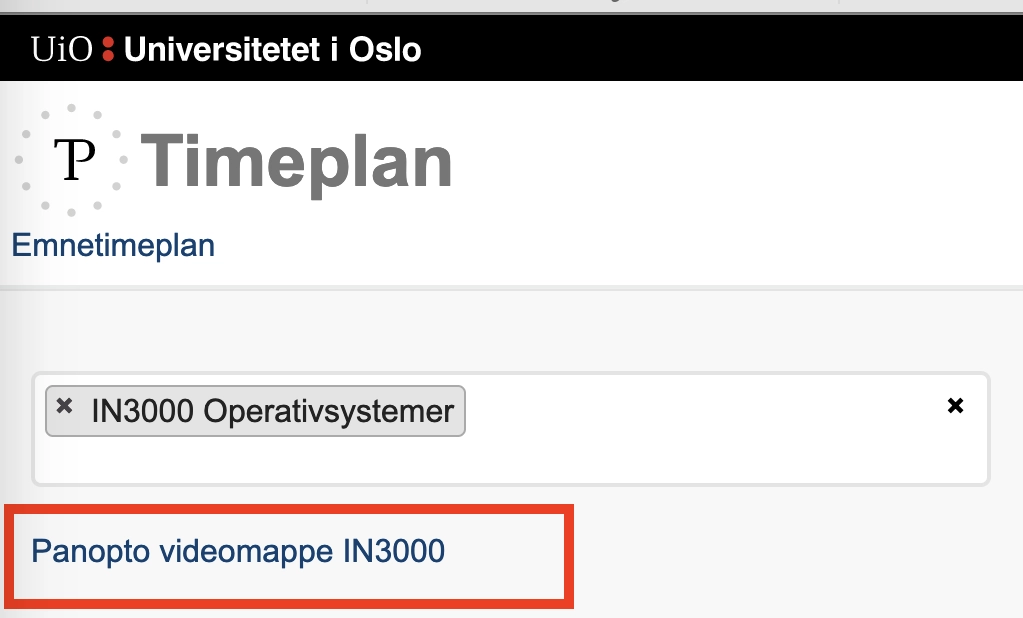
In the course schedule, there is a link to the Panopto folder for the course at the top (only for courses with a Panopto folder).
- Follow the link to the courseˇŻs Panopto folder. Log in to Panopto if necessary. Recordings should normally be saved directly into the Panopto folder for the course.?
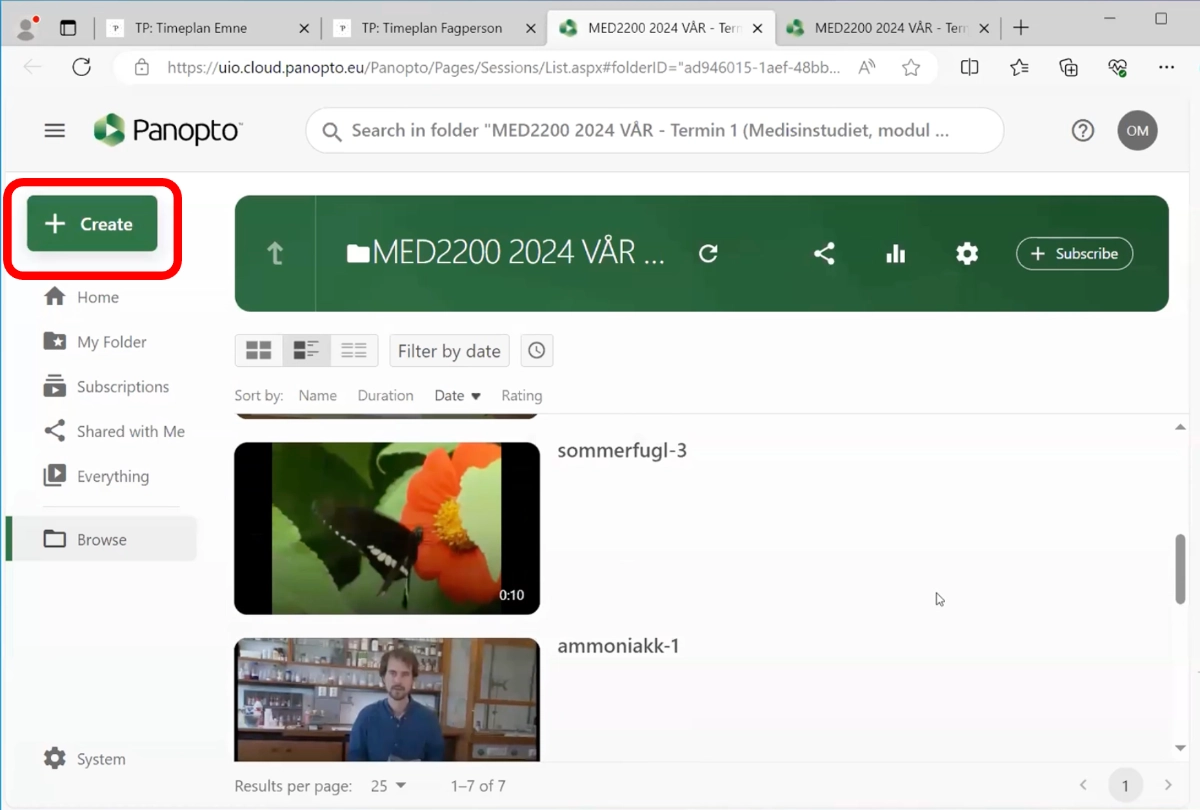
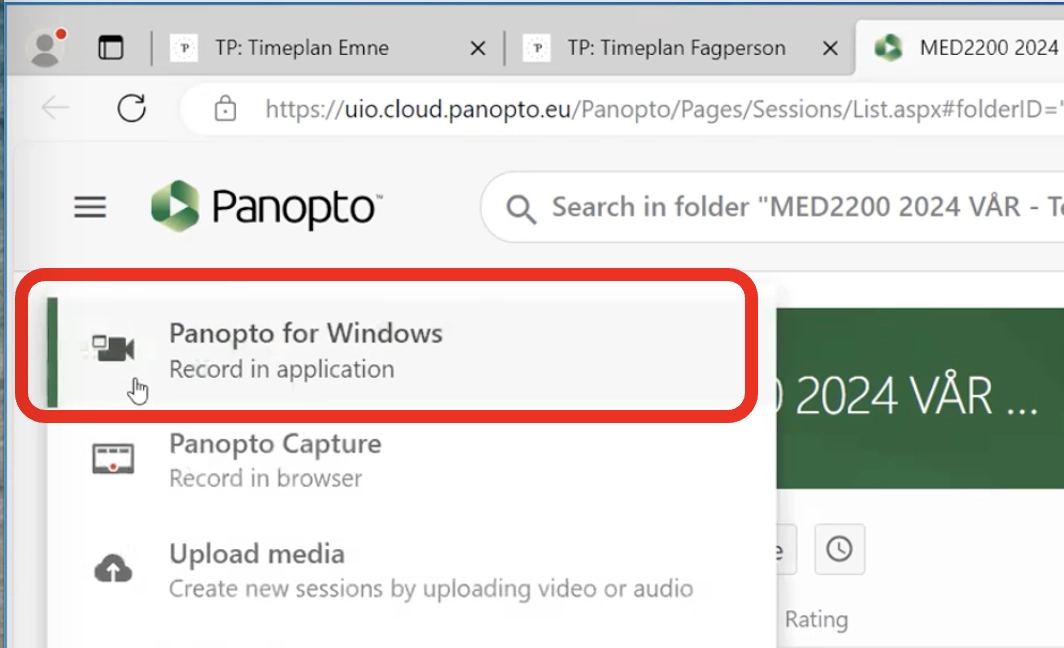
- In the courseˇŻs Panopto folder, click the Create button in the upper left. Select Panopto for Windows.?
- The program will start after a few seconds if installed (sometimes you need to click an extra button the first time).?
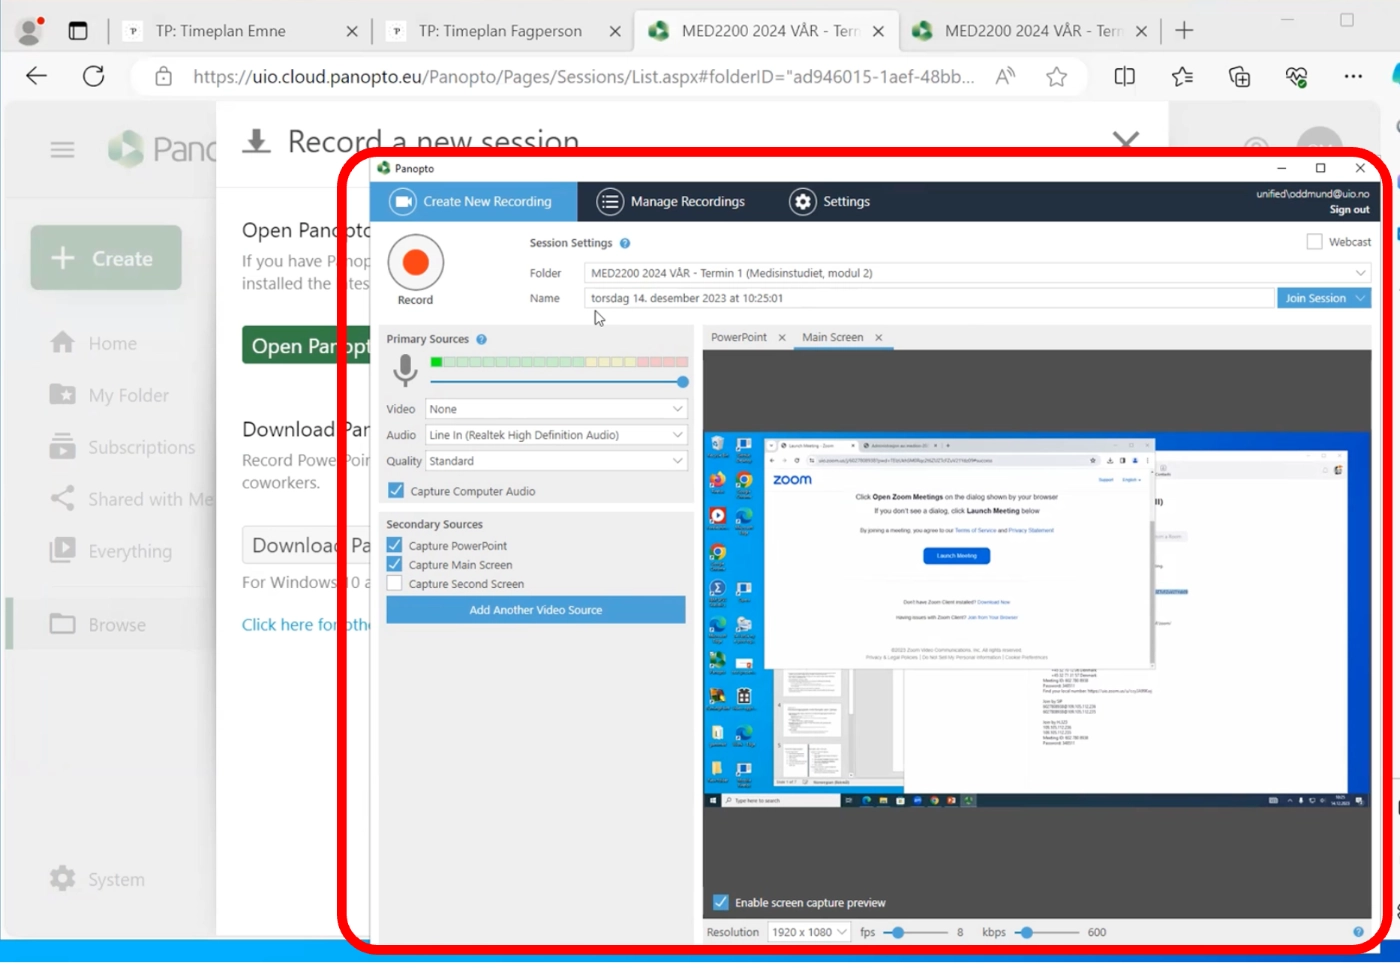 The Folder field should now show that the recording will be saved to the Panopto folder for the course.
 -
Give the recording a descriptive name (not too long) in the Name field. If left blank, the date and time will be used.
-
Choose what to record in the left section of the window.?If there are multiple screens, it is recommended to check Enable screen capture preview (at the bottom of the preview) and also check Capture second screen.
-
See the information in the auditorium for the correct choice of video and audio sources.
-
Start the recording by pressing the red Record button.
-
Stop the recording when the teaching activity is finished.
The recording is uploaded continuously while in progress, so there will usually be little waiting time afterward. Quality control and linking the recording in the schedule can be done later.
The recording will be processed on the server for a short time before it is ready to use. If the folder is set up with automatic captioning (Autotekst), this will be ordered automatically. Automatic captions may take a few hours. When ready, the video will have a CC button. Captions will be available immediately for anyone who can view the video, with a note that they are automatically generated and may contain errors.
The recording will normally be available to students as soon as it is ready, but it may be hard to find at first. To make it easier for students to locate, the recording should be linked in the schedule (see below).
Linking a recording in the schedule via TP
To make a lecture recording easier for students to find, it should be linked to the lecture (teaching activity) in the schedule. The right time for any quality control of the recording and captions is before adding it to the schedule.
- Log in to TP
- Find the lecture (teaching activity) either in the personal teaching schedule or the course schedule.
- Hover over the right side of the activity row and click the Edit button.
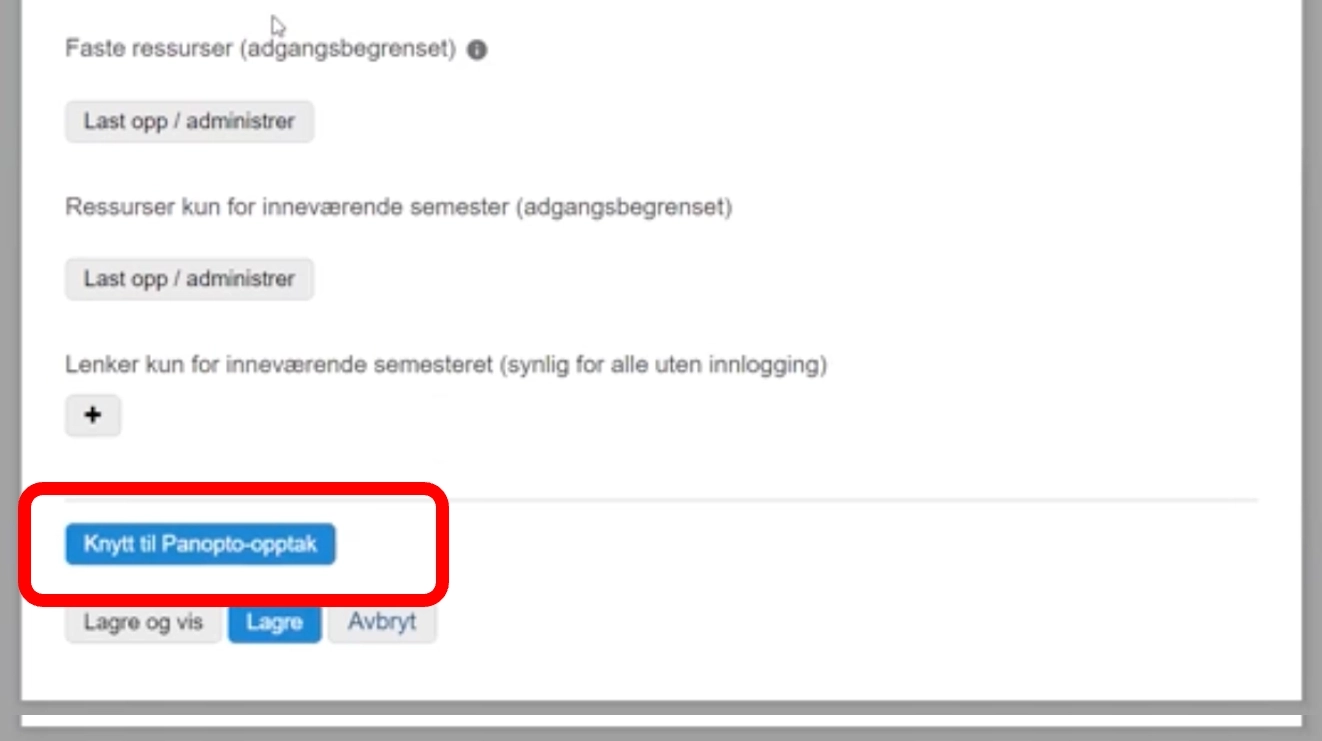
- Near the bottom of the page, there will be a Link to Panopto Recording button (only for courses with a Panopto folder). Click it.?
- The next screen shows the videos in the Panopto folder for the course. Select videos by checking the Link column and clicking Apply at the bottom.
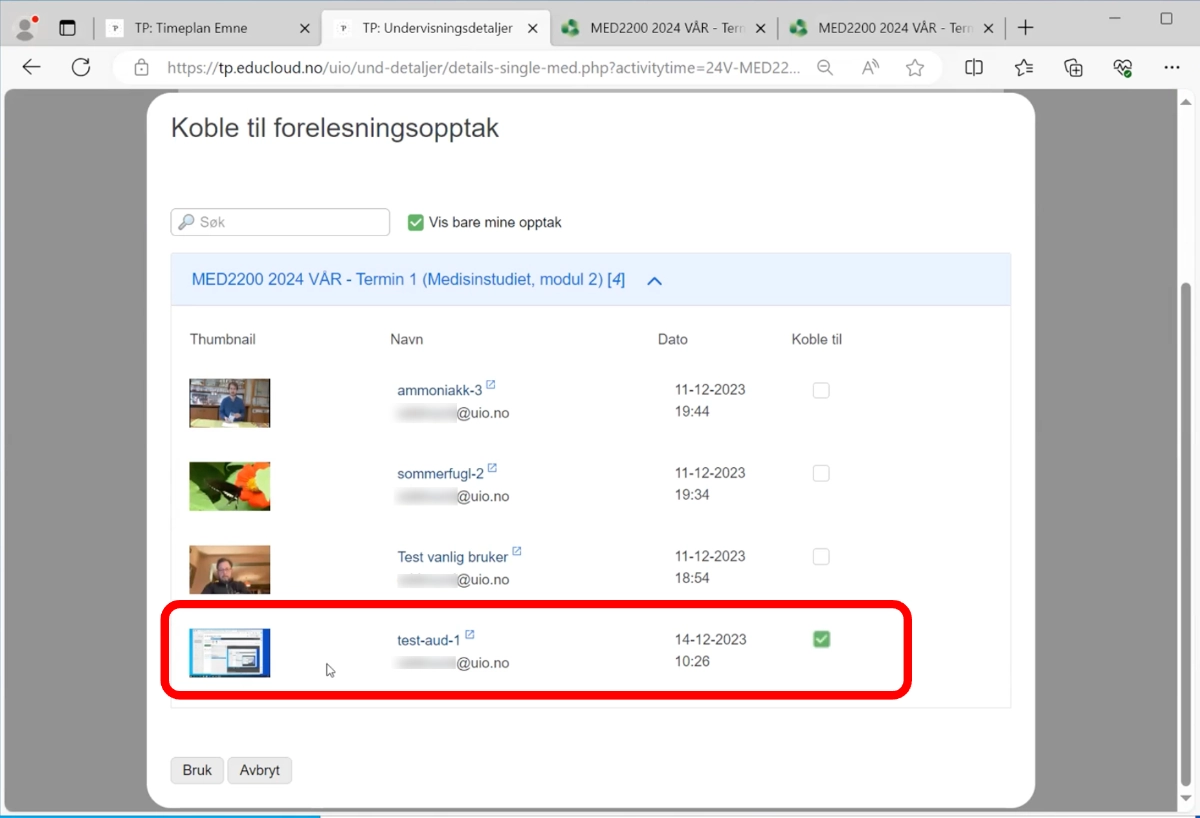
By default, only recordings you have made will appear (the option Show only my recordings is checked at the top). Uncheck this to see recordings from others.?You can also search by name or username in the Search field. - Click Save and?view to finish. The recording will now appear in the schedule, including in the My Studies schedule for students.?

Hybrid teaching in an auditorium with Zoom and Panopto recording
For hybrid teaching from an auditorium, you often cannot wait for Zoom recordings to finish processing on the teaching machine after class. In such cases, you can use Zoom to share the lecture with remote participants, while using Panopto for recording.
For hybrid teaching from home, it is easier to record in Zoom and then upload the recording to Panopto afterward.
When using Zoom and Panopto simultaneously on Windows, note that Windows cannot process video from a camera (e.g., video of the lecturer) in both programs at the same time. However, screen capture and audio can be handled by both programs simultaneously without issue.
Recommended order of steps:
- Start Panopto for Windows as usual (steps 1¨C6 in Recording lectures in an auditorium above).
-
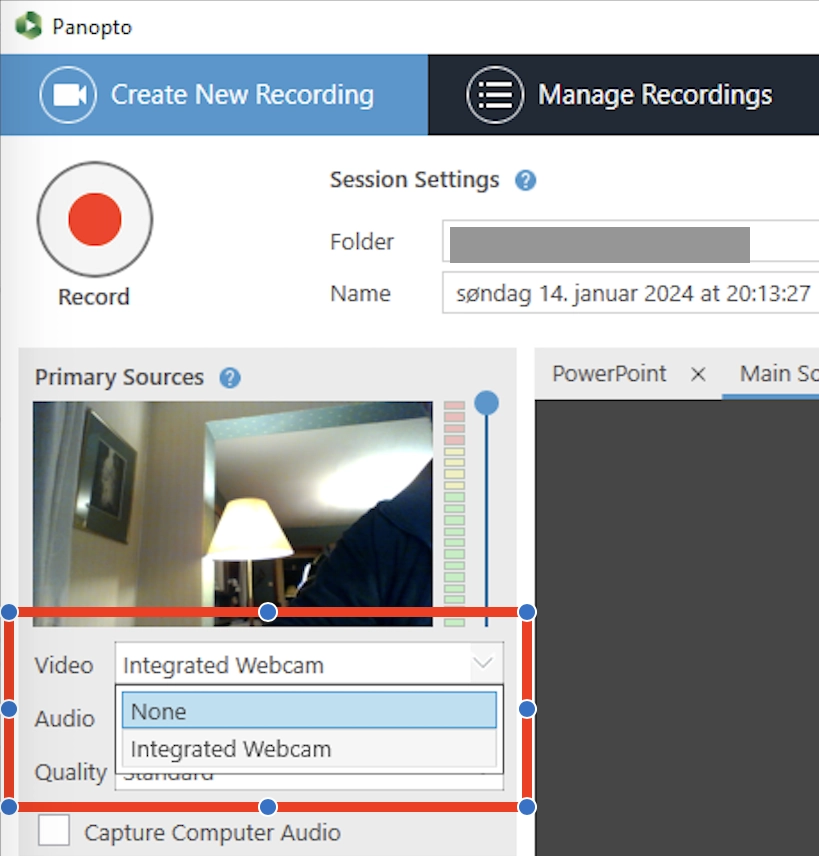
Under Primary Sources in the left panel, set Video to None. This leaves the camera available for Zoom when it is started afterward.?
-
Under Audio, select the microphone used in the auditorium. Test the audio levels in Panopto for Windows (green bar).
-
In the right panel of Panopto for Windows, select the screen to be recorded. It is recommended to check Enable screen capture preview to see what is being recorded.
-
Start Zoom
-
Start the recording in Panopto for Windows by pressing the Record button.
-
Continue as described in Recording lectures in an auditorium above.
?
Recording on your own computer?
Download and install the Panopto client for recording
The Panopto software is only used for recording.
To download Panopto, you can either do this via Software Center (on UiO machines), or by logging in to the Panopto website and clicking the Download Panopto button at the top right, then selecting the correct operating system.
More information on how to install Panopto on Windows can be found here (please use Software Center as described above on UiO machines).
More information on how to install Panopto on Mac can be found here.
If you are using Linux, recordings must be done through the web browser.
?
Recording in Panopto
It is recommended to record using the Panopto software if you are on Windows or Mac. To do this, you must first download Panopto (see above).
It is also possible to record in Panopto through a web browser (e.g., Edge, Firefox, Chrome, Safari).
Selecting the correct folder
When recording in Panopto, it is important to ensure the correct folder is selected. In Canvas, the correct folder is automatically selected when you click?Create?from the "Panopto Video" page in the navigation menu of the Canvas course. In Panopto itself, the correct folder must be selected manually.

You can check which folder is selected inside Panopto, as shown below

Windows
We can open Panopto and start recording, but there are steps we can take before recording to improve the quality of the recording.
Panopto provides a guide for preparing and conducting recordings in Panopto on Windows.
Mac
We can open Panopto and start recording, but there are steps we can take before recording to improve the quality of the recording.
Panopto provides a guide for preparing and conducting recordings in Panopto on Windows.
Browser/Linux
If you are using Linux, or do not have access to the software, you can record in Panopto via your web browser. Read about how to record in a browser here.
Set transcription language for captions
It is important that the correct language is set for transcription. This ensures that the transcription software can understand what is being said.
If you have set the wrong language and wish to change it for a video, it is possible to have it re-transcribed.
When setting up a new course for the first time, it is a good idea to ensure that the correct language is set for the course folder. By default, Norwegian should be selected, but if the course is taught in English, this setting must be changed.
- Inside the Canvas module page Panopto Video, click the gear icon at the top right.

- Then click?Settings.?

- Scroll down to Content Language, click the dropdown menu, and select the desired language.?


Use automatic transcription for subtitles?
Transcriptions are usually set to not be visible to students because the quality may be low (the quality is generally better for English recordings, but there may still be some errors).
If you wish to publish the transcription, you can read how to do this here.
If you choose to publish the transcription, it is necessary to review the content and ensure that it is understandable. If you make few or no changes to the text, it is recommended to add the following note at the beginning of the video:
This is an auto-generated transcript with variable quality
Useful guides for lecturers
You can visit the linkes below to learn more about...
?
Call us
Opening hours are weekdays from 08:30 to 17:00 and Saturdays from 10:00 to 15:00.
Phone number: 22 84 00 04
Book a Zoom meeting
Students and employees can book a Zoom meeting with UiO Helpdesk. Available hours are Tuesday to Thursday between 11:00 and 13:00.
Book a video call